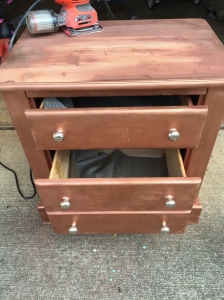
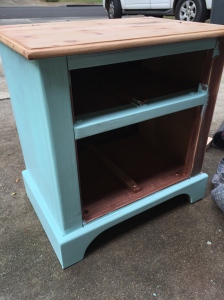
A one day project.

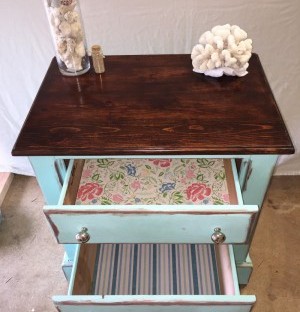
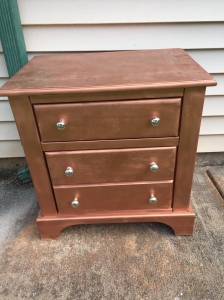
With all of the more time-consuming projects, its nice to be able to crank something out in a matter of hours. I found two end tables/ night stands that were in good enough condition to re-do! My oldest slept in this morning, while my youngest was up at 6am! I started early, and luckily worked through nap time. The most time-consuming part about these tables, was the drying time. When working with chalk paint you want to do thin coats. I did about 8 coats per table, using the white paint. (I make my own chalk paint with plaster of paris.)

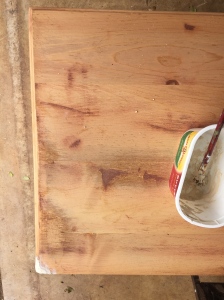
Before I could paint I did some minor sanding, glued some loose wood parts and clamped them overnight, and re-stapled the inside board liner. Then, I started painting!

The drawers are my favorite of the piece. Normally, I am “distress” happy. I was able to keep the white clean for a shabby chic look, while adding light tones to the dresser for some color detail.

The technique I used for the drawers was simple. Paint the drawer with the color, allow drying time, and then cover with the white paint. Before the paint dried, I would wipe the edges and face to get a “white wash” look. It’s easier to do while wet, as opposed to dry. When it was dry, I used the same damp cloth to get the distress look, rubbing gently enough to not take the paint completely off.

Normally, I would use sand paper… but I wasn’t looking for an antique look. I simply wanted to add some variation and color to the drawers.

Sorry about my lack of step-by-step pictures. I was amazed by the fact that my children allowed me so much free time, and took advantage of the situation!

But here are the end results!

Changing decor on a budget

I love decorating. I love it so much, that most of my time is spent looking for things that I can turn into something else. I enjoy browsing different websites in hopes to either find something on sale, or find inspiration for a “DIY.” Pottery Barn is my biggest weakness, along with Jonathon Adler, and don’t get me started on Anthropologie. If you haven’t caught on yet, these are expensive stores. Now, although pricey, you really do get what you pay for. We purchased a vanity for my daughter for Christmas, and it is BEAUTIFUL. Craftsmanship is on point, and the quality of the materials are very sturdy. Although we paid a pretty penny, it was worth every cent! Besides the high-end stores, I look elsewhere for basic decor needs. Target is a must, especially if you can find sale and clearance items. I’m not big on spray painting wood, but you’d be surprised what a 5 dollar can will do to small knick knacks and figurines! Next on the list (which is actually my starting point, ALWAYS) Ross, TJ Maxx, and Marshall’s. These stores are constantly getting new shipments of household goodies. I do tend to see over priced items as well, but if you look hard enough, you can find some hidden gems. For instance; It took me about 2 hours around the store and multiple items to compare to this piece. I wanted something that had character, but still had that “country-modern” look. This is a good center piece because you can add small pieces to the top shelf, and in my case, eventually figure out an idea for the hooks. This was a $40.00 item, and being a bargain shopper, I reeaaally didn’t want to spend that much. Spending that much on a finished piece is totally different then having to give it a complete makeover. I was able to meet in the middle, because I had a great idea for it! I browsed the shelves for items that could be placed on top to add some more country charm. Luckily, I found a set of (6) glass coolers, which are similar to a mason jar. At $8.99 was a steal! It came with a nice wooden tray which I used in my kitchen window to hold my spice plants. The other jars will be used for different Decor ideas as well. It’s easier to buy things that can be dispersed throughout the home to help you save money! So, we are now at 50.00 with the total price for the glasses and shelving unit. It only took me about an hour (including drying time between coats) to paint, sand, and wax. Painting he jars took another 30 minutes. The flowers in the jars, were taken from a centerpiece I had originally used in my kitchen. If I saw this finished piece on Pottery Barn, I wouldn’t be surprised to see a $200.00 dollar price tag attached to it!! That’s not even including the jars and flowers! So, with a total cost of 50.00, and the materials I already had on hand, I’d say this was a successful project! We’ll worth the money. I had some small decor that I recently spray painted white. Which saves me money because I can reuse them. I even refinished our coffee tables, which saved us money from having to buy new ones!  It’s amazing what a new paint job can do! I also enjoy trips to thrift shops, and antique stores! They can be very picked over, but if you go enough you are very likely to find a good bargain! Antique store- $15.00 wash board. It goes perfect with my “country-modern” theme. I can either add hardware to hang it, or prop it up against the wall. It’s already aged looking, which makes it worth the price! It’s needs very minimal work done to it.  This room is still a work in progress, but the best tip for decorating on a budget, is to start with what you have. Move things around the room until you find what works best for you.  You can always add along the way!    Thanks for reading!

A true antique with a new look

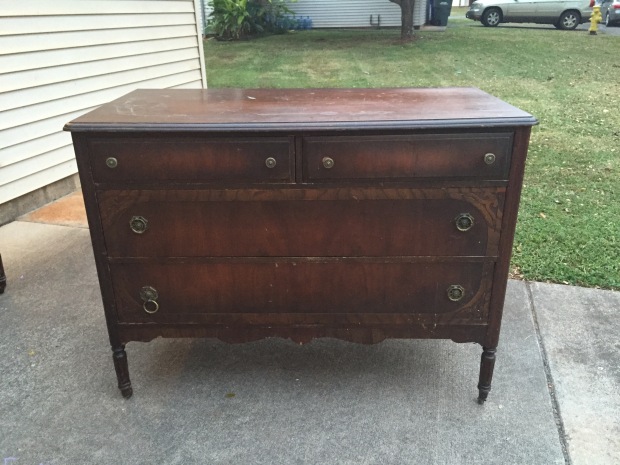
I am so excited to have finished the dressers! This set was such a fun trip to the past. These were purchased from a women who had carried them around for more than 25 years, and she was not the original owner! Unfortunately the only Clues to what time, and where, are the marking on the back. Chest no. 18. How cool is that!? I love history, and I can only imagine how far these date back. My friend, Sarah is the proud owner of the pieces, and I was lucky enough to work on them!!

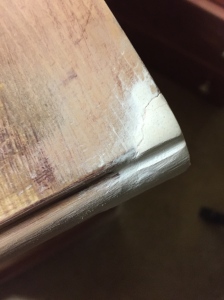
Since this was an old dresser, there were a lot of minor fixes that needed to be made. Two out of the three  drawers were completely jammed, and had to be sanded down due to swelling of the wood. A chunk of the back corner in a drawer was missing, and some of the veneer was peeling off of the sides. Although minor, they took some time.
  
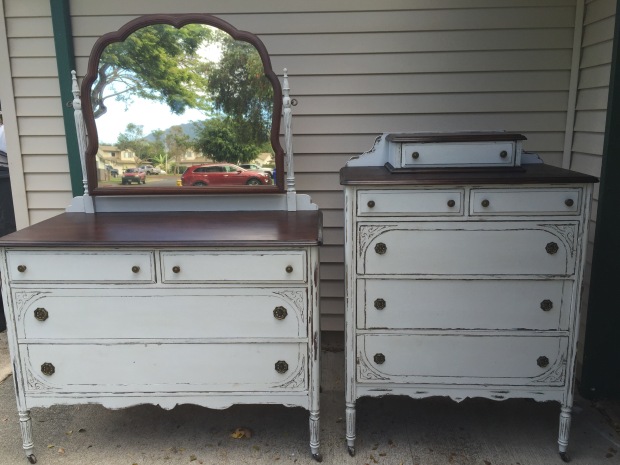
This was the first dresser! The top of the dressers were sanded and stained. I used Cece Caldwell chalk paint on the frame and drawers. (The original color was Silverhill fog. I mixed it with an off white to achieve the correct color of grey.) I used the “antiquing” method to age them, and finished them with the soft wax!

Always start from the top and work to the bottom! Sanding the tops was time consuming and required a lot of sand paper. I had to go through layers and layers of gunk and stain. Given the age of the dressers, I also had to even the tops and sand out scratches and Knicks. The edge of the dressers had not weathered like the tops, and therefore, needed more attention.

Once the tops were smooth, I did about three coats of stain (Jacobean)


Before I could paint the frame and drawers, I had to sand the drawers down to fit back onto the tracks. Years of heat had caused the wood to swell and bow outward. All three large drawers were jammed! It was also a very time consuming task.

Broken side to a drawer. Fixed with wood putty and sanded down to match.

I could FINALLY start painting!

Like I mentioned, the chalk paint I had purchased was mixed with a white paint and plaster of Paris before I applied it to the dresser! The original color was not what Sarah wanted, but it was very easy to fix!


And the end result of dresser number one!! I was very pleased with how it  turned out. I kept all of the original hardware from the dresser, as it helped show its true age!

Dresser #2


Same idea for this dresser. I had to replace the runners inside of the bottom drawer, and fix a wheel. The top was also detached from the frame, so that had to be nailed, glued and clamped.

Sanding the top to this one took just as much time as the first dresser. Covered in years of stain, gunk and had some very deep scratches.


This dresser also came with a mirror and stand. The end result?  

I can’t wait to get started on my next set of dressers! They are from the early 1900’s!

Thanks for reading!

Saving an end table from a bad paint job

Last months purchase was another mistreated table. I am going to take a wild guess and assume it was a “Pinterest fail.” What is up with all of this furniture being spray painted?  Unless you know what you’re doing, of course. I was a little disappointed with this table, however, because it needed a LOT of work.

The original piece;

IMG_0143

Aside from the horrible paint job, there was also a corner that was completely missing. I sanded the top first, so that I could fix the corner. (I had started to fill it in before I took the picture.)

IMG_0147   IMG_0170

I used a wood putty that dries as hard as wood. I had to sculpt it to match the rest of the corners.

IMG_0172   IMG_0174 IMG_0194

I continued to sand and add putty until I was pleased with the look.

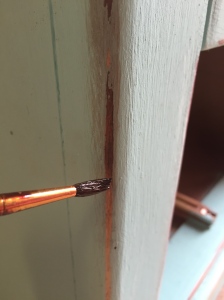
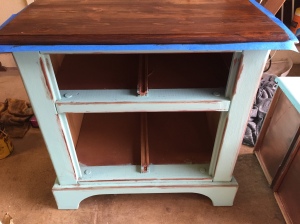
Next, I sanded the table where I wanted the “antique” look to be. Along the edges that stuck out. I then light sanded the edges, so that I could stain where I wanted the “antique” look. Then, I painted with an aqua chalk paint mixture.

IMG_0208

I did about 3 coats of paint.

After it was dry, I sanded the edges back down to the bare wood. Then, with a brush, painted the stain on and immediately rubbed the stained area with a rag to rub it along the paint surrounding the wood.

IMG_0212      IMG_0211

this was a new technique of “antique-ing”, that I had currently seen on Pinterest. I was very pleased with the results!

I always wait to stain the top, because I want to see how the finished paint job looks, which gives me an idea on how dark, or light I want the top.

IMG_0213 IMG_0226

I kept the original knobs, because they added a nice touch to the paint color!

IMG_0215

After I was finished painting, staining, and putting the knobs back on, I decided to take my project one step further!

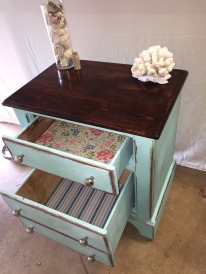
My favorite part? The paper in the drawers!

IMG_0397  IMG_0411

I matched up my favorite papers to the paint color. I loved the stripe look, because I feel it gives it a beach look. The pattern of the flowers and color scheme keep it fun, while staying with a classy look. I used mode-podge to adhere the paper to the drawer, and then applied another layer to seal it.

The finished project?

IMG_0463   IMG_0464     IMG_0462

This piece sold the same day I posted it. Which did not surprise me, it is beautiful! Of course, I’d have to say I did a pretty good job staging it as well!

Thanks for reading!

A special cake for a very special girl. 

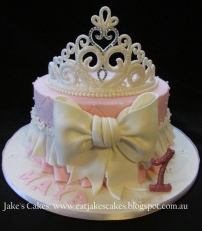
First on my list of “weekly projects”, making my daughter’s birthday cake! I had previously posted that I would be making something like this;

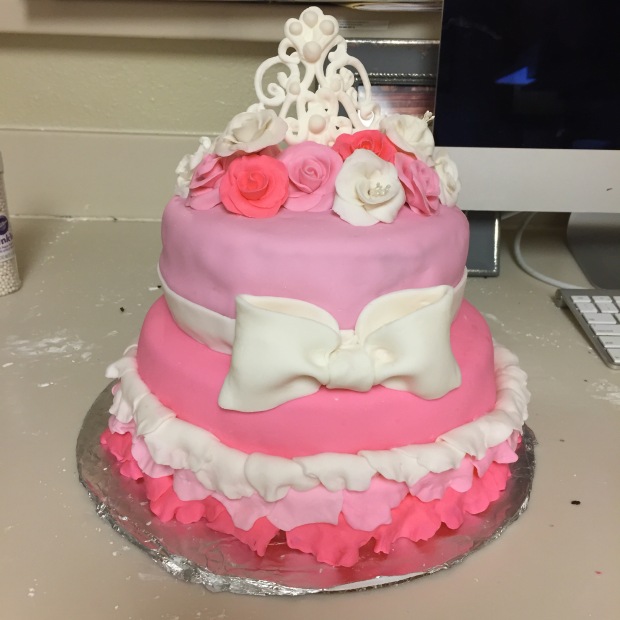
Here’s what I came up with!

These were made days in advance, so the fondant would harden.

The crowns were made out of royal icing!

Same day preparation:

The bottom tier is funfetti cake with a whipped marshmallow buttercream!

The top-tier is Chocolate with a chocolate Ghirardelli whipped buttercream.

All of the fondant is vanilla flavored.

The ruffle layers are petals that I stuck to the cake.

Then, one in the morning rolled around and pictures slowed down, the cake just needed to be finished. I watched a tutorial for the fondant bow. It was very easy, and I was able to stick it to the cake while soft. I got a little sloppy with the second layer, unfortunately. As you can see, the chocolate is showing through the light-colored fondant and is not smooth. Just a small flaw…

This was my first time covering a cake with fondant, stacking with fondant and decorating a cake with fondant! I really enjoyed making this cake, and learned a lot along the way. I definitely feel like this was a very tedious project that took a lot of time. It was also a very rewarding project, and I will be making more in the future! This also made me realize what it takes to be a cake baker. If you order a custom cake, expect to pay a nice chunk of change, they deserve every penny!

Thanks for reading!

I will post pictures when it’s cut!

The power of healthy hair, and how to achieve it.

IMG_5476

Whether it’s your best asset, or your worst enemy, we all have the same problems when it comes to maintaining healthy locks. Our hair takes the fall when we are fighting the elements, using hot tools, or have a “lack of product knowledge”, and the end result? Unhealthy, unmanageable hair.

I love my hair. I also baby my hair. It’s because of  those two reasons, I have healthy hair! I have tried numerous shampoos, conditioners, masks, leave in treatments. Been there, done that. What do I use?? Well, I do alternate between my shampoos and conditioners. I use anything from Pureology color care, Paul Mitchell’s Awapuhi Ginger, and Carols daughter Monoi. The professional hair products are only guaranteed when purchased from a salon. Never buy from a drugstore. Are all of these pricey? Yes. But you really do get what you pay for.

First major rule to product, is that I strive for sulfate free. I am in the sun, wind, and ocean water far too often to mess with hair product that will dry my hair out! Speaking of dry hair, did you notice I did not post a leave in conditioner?  Well, my secret weapon, is Olive oil. Good old olive oil. I buy the all 100% organic extra olive oil. But, I have also used the non organic and didn’t notice a difference in the results! Anytime I feel slight dryness in my hair, especially after the beach, I do a simple treatment. All this requires is warming up 1/2 to 1  cup, depending on hair length and thickness, of olive oil in the microwave and saturating the ends of your hair, and working up to the mid shaft. Sometimes, I cover it with a towel or shower cap to hold the heat in, other times, I hop in the shower and let the hot steam do it for me! I never put the olive oil on my scalp. If the fine hairs by my face feel dry, I will apply it, but only enough to saturate, without saturating my head. I say 1 cup because if your hair is dry, than it’s porous and will absorb the olive oil. A little bit goes a long way. I have a lot of hair so I try and rinse out as much of the olive oil as I can during my shampoo. If I feel that my hair is still heavy after I rinse (weighed down from the oil) I will apply a clarifying shampoo or baking soda and water paste, and massage it until I rinse it all out. Next, comes the conditioner. Remember, you just poured an entire cup of olive oil on your hair, so go easy on the conditioner. I apply the conditioner, and once again, wash out any left over oil. The shampoo and conditioner are what is going to pull that oil from your hair.  After washing with both, water alone will not remove any excess oil.  You will need to make sure that you get it all within the first 2 washes. Once I get out of the shower, I do not put my hair in a towel. Your hair is at its weakest point when wet, so twisting and pulling it will only cause damage! I squeeze out in the shower, and then blot dry. I also, wait for it.. do not use a hairbrush. I use my fingers before the shower to detangle, because like I said, detangling your hair in the shower when its wet will cause damage. If you struggle from frizziness or need to put something in your hair, I would suggest to wait until the next wash. If I put anything in my hair it’s a dime size of coconut oil to tame frizz. I do not suggest doing that after an olive oil treatment. I also do not blow dry my hair or straighten it. Eliminating any hot tools that might also cause damage. Once a year I might put it in hot rolls, but that if I am attending a special occasion.

Due to the climate and activities I partake in, I do the olive oil 1-2 times bi-monthly. Depending on what I put my hair through, sun, salt water, etc. You don’t want to overdue it, because you can also dry your hair out. Especially, if you are using a moisturizing shampoo and conditioner! I would also make sure that I am washing with a clarifying shampoo if you plan on doing this more often. Rule to live by, don’t fix something that’s not broken. Only do a treatment when you feel your hair is dry. Otherwise, leave it alone!

However, I am guilty of one thing, my hair is colored. That’s what stands between me and flawless hair. Occasionally, I get my hair colored. Luckily, I have that down pat, too! I avoid color with a high ammonia content. Anytime I have called to set up appointments, the first thing I ask is, “What line of color do you use.” My preference? Paul Mitchell, Redkin. Ask about the ammonia. There are also other numerous things I consider before giving a salon the “OK.”

1.) The color they use. When looking for color, you have three options, Permanent, Demi- permanent, or Semi- permanent.

-Permanent contains ammonia so the color molecules can penetrate the hair cuticle, giving you permanent color. This is especially used in people who want to color greys, or lighten natural hair. A plus to permanent is that if you plan on keeping the color, you’ll only have to do a root touch up when it grows out. That eliminates all over re-color.

-Demi- permanent contributes a color pigment without penetrating the cuticle. Due to its lack of ammonia, you cannot lighten your hair with this type of color, and it also does not change a permanent color. If you’re planning on dying your hair dark, this could be a good option! However, It is said to fade after 28 washes. So you’ll have to fix your roots by either re-dying your whole head, or getting a root touch up to match up to your current color. If you’re wanting to go from dark to light, you cannot use a demi, due to the lack of ammonia and only small amount of peroxide.

-Semi- permanent is for first timers, or someone looking to change the hair pigment for a little while, it contains no ammonia and no developer. It simply stains the hair and washes out between 6-12 washes.

I prefer Demi- permanent because I get a dark all over color to start with, and then let it fade as my hair grows. I am only able to do that because the sun fades my hair fast in Hawaii, and fortunately for me, close enough to my natural color that I don’t have to run to a salon when I notice regrowth! It is not as harsh against my roots, and I can hold off from the root touch up! I am also confident in the demi- permanent because sometimes we need that fresh all over color to give us that “new life” we have lost from the natural elements. I would rather have another all over demi- color than have another permanent hair color, when in the end, both start to lose their luster and shine.

2.) Who my Beautician is and if they are willing to give me what I want. It’s common to run in to a problem where you let the hairdresser give you something they wanted to, which ends up costing you more money in the end, to either touch up, or fix because it’s not what you asked for. If you’re not comfortable with what they suggest, just say no. It’s not their fault if you let them do it, knowing it’s not what you want. (Unless you Have Barb Clair from Tangles in Magnolia, Ohio. She never disappoints.)

3.) What type of brush they use. The most bizarre thing that has ever happened to me, was going to a nice salon, and having the beautician rip a PADDLE BRUSH through my hair, after she washed my color out. Do you know how fragile your hair is after you not only dye it, but it’s wet????? Yea, either did she. Let me take you back in time, here is a paddle brush. She used this on my WET and TANGLED hair. Needless to say, I never returned.

GelousGrip_Paddle_Detail.ashx

Don’t get me wrong, I know some people that buy “special wet brushes and use them on their wet hair. These brushes are specifically designed to untangle while wet. They can range anywhere from 5-50+. You will not see me using one, ever. No matter what the comb is “promised” to do, if your trying to achieve healthy hair, it’s not the brush for you.  here is the type of comb I would suggest;

220

This baby is amazing! My sister-in-law introduced this to me for my daughter’s curly hair. It is wide toothed, so it gently detangles with less friction. I use this comb between washes, when my hair is dry. I always  comb my hair gently, starting from the bottom. Also, if you prefer to use a comb as opposed to your fingers to detangle your hair before your shower, this would be the one!

4.) Over the phone consultations are not a real thing. It is impossible for a stylist to know what your hair type is, what color challenge she is facing, and what needs to be done in order to give you what you’re asking. Go in. Especially if you’re trying to get a price quote. Nothing is  worse than going into the salon and being given a new price on the day you were supposed to receive your service.

5.) Lastly, but most importantly. You get what you pay for. If you do not like what was done, at least you know that they will fix it, because you have paid a lot for the service! If you want someone to give you excellent quality, you’re going to have to pay for it. You may run in to a beautician who doesn’t give you the desired look, but someone there will fix it, and more than likely for no extra charge.  I’d rather pay a little extra for sharp scissors and a reputation, because in the end, it’s my hair that’s on the line!

I have had both good and bad experiences. In the end, I learn from the bad and spread the knowledge that I have gained from the good. I take pride in having healthy hair, and you should too!

Thanks for reading!

The grey accent table

When I finish a more time-consuming project, I like to do smaller ones that can be completed in a matter of days, instead of weeks. That is when I start to look for items that are on the “budget friendly” side and are easy to flip! I don’t mind buying things that need work, but it’s more satisfying to get a piece, do minimal work, and sell!

This little end table got a makeover last weekend! You’ll have to excuse my lack of “step-by-step” pictures, because we had a power outage and that’s when I did most of my painting!

This was the original picture I received from the seller;

Of course, the second I brought it home, I sanded a couple rough spots, washed it down and gave it a fresh coat of paint!!

I gave it about 3-4 coats with a chalk paint mixture I made! The paint color is Ocean Current. Although the picture makes it look extremely purple, it actually has a grey look to it.

I painted the drawer the same color, and then painted another chalk paint over that. It is a very white-grey. I added a really nice touch to the middle shelf, by modge-podging scrapbook paper. I also added two coats of polycrylic to really seal and protect the paper. The draw was “antiqued” with sand paper, so that the grey and original color showed through.

I lined the inside of the drawer with paper as well. Finishing it with the 2 coats of polycrylic.

My favorite part about this piece is the variation between a clean solid color, and the antique drawer. Scrap book paper is a good way to add detail to a plain piece. Although I chose to put a basket to dress it up, it doesn’t need one!

I am enjoying the projects with the home-made chalk paint! My next project (1 out of the 4) Is probably my most exciting! I will be using the CeCe Caldwell brand of chalk paint. (pre-made) I also purchased the dark wax made by the same company. How cool are these antique dressers???

I have the privilege to give these a fresh new look!! Stay tuned for the finished product!

Thanks for reading!

A weeks worth of projects!

I have added a lot on my plate this week, my youngest will be turning 2, so I am making a beautiful princess cake. I also have 2 furniture projects, an end table, and coffee table. Both tables require a little more than just painting. One has an end that needs fixed, and the other has a leg that needs re-built! I have been off of the blog for a couple of days, but when I do come back, it will be with THREE finished projects!

Here’s a look at what I am getting myself into:

1.) Birthday cake

e66299e0909a81ab78f4ada48da62448

Something on the lines of this, is happening. I have already attempted the Tiara with Royal icing, and I have to admit, I’m in love!!

2.) Coffee Table

IMG_0083 IMG_0085 IMG_0090 IMG_0095 IMG_0098

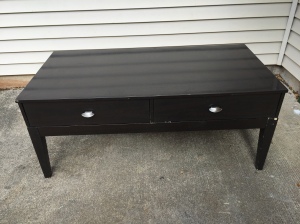
Having to make a new leg for the table, and sand to paint. It’s very time-consuming.

3.) Night Stand/End table.

This is probably my second favorite of the two (Cake being first, of course.)

IMG_0143 IMG_0147

After I fix the back right corner, and finish sanding, I will be able to repaint! I have a couple of ideas for this one.

I will be posting 3 separate blogs on each project, stay tuned for the end results!!

Thanks for reading!

Letting go and letting God. The power of prayer.

There are few things more powerful than the faithful prayers of a righteous mother . -Boyd K. Packer.

Unknown

In the past month I have become stronger in finding comfort in my own worries.  The worry of my children. Too often I find myself trying to hold on to their youth.  We want so badly for time to freeze, so we don’t have to miss a beat in our children’s lives. I find myself holding on to every bit of baby that they have left in them. From time to time, I will joke with them and ask “Can I keep you forever?”, or “Do you think you can hold off from growing for just one more day?” They think it’s funny, but if only they knew I was being serious.

As much as I wish I could keep my babies, I enjoy experiencing each new milestone with them. Having two daughters that are constantly showing their love for each other, and doing it with such compassion. Vivian is doing a wonderful job as a role model. It’s important to me that they understand the grace of kindness. At the end of the day, when we realize that we  have two innocent little children, amazed by the most simple things, shows us how to look at the world differently.

It came to me one day, that all of these worries and thoughts were not only bad for me, but also for my children. Instead of asking them to stop growing, I should be telling them that I want them to grow and prosper. We spend some much time teaching our children and preparing them for life. This is where God had to come in. We cannot control what happens, and as much as we’d like to think we do, we do not. So, instead of trying to hold on to what we have now, we need to prepare them for whats to come. Let God take control.

A struggle I faced personally, was letting my littlest one have her own space, her own room. The hardest part for me, was realizing how important it was for her to experience independence.  From our room, to a big girl room. We are constantly showering our little babies with love, always there and rarely do we leave them. She needed a place all her own. Our house set up isn’t exactly convenient for a family with small children, and the thought of her bed across from ours was so relieving, because I could protect her. What exactly am I protecting her from? The chance of a burglary? An accident? Fear? Where there is worry, there is God. So, I prayed, and prayed, and prayed some more. For strength. We co-slept with both of our girls and it was the best thing we ever did. Besides, they’re only little for a little while! When our oldest was ready, she made the move. However, our youngest is so different from our first born. An independent, fearless leader. So why was I holding on to her so tight? Vivian is still dependent on us when it comes to insecurties, and more often than not, ends up in our bed, but that’s okay! She needs us, while Scarlett is confident. When she does cry at night, we get her, reassuring her that we are still here for her. However, letting her make that decision, as opposed to giving it to her. Now, if you ask why the rush, there wasn’t a rush. We are not holding her back from needing us. We are still here. When she does cry in the night, we are there to either put her back to sleep, or let her cuddle with us. However, I have found such relief in my decision. I stopped trying to control everything. I gave my worries to God, and he took them. What may seem like a silly problem to you, was causing anxiety to me. The love for your child can never be too great. As a mother, you will do anything to keep your child safe, but should go about it in a positive way. Lock your doors, bar the windows, have your monitor, but the biggest security system is already there, God. So, pray for your children. there is nothing stronger than the power of prayer. If you ask, you shall receive.

Maybe you’ve dealt with a similar situation, whether you’re the over protective parent, or worry wart. We have all been there in one way or another.  Did you find strength in God? Did you decide to listen to your children, by watching their actions and responding to their individual needs? It’s never to late to give it all to God. Pray.

“Casting the whole of your care,all your anxieties, all your worries, all your concerns, once and for all on Him, for He cares for you affectionately and cares about you watchfully.” -(Peter 5:7)

“Some of us think holding on is what makes us strong, but sometimes is letting go.” -(Herman Hesse)

“Don’t you be afraid, for I am with you. Don’t be dismayed, for I am your God. I will strengthen you. Yes, I will help you. Yes, I will uphold you with the right hand of my righteousness.” -(Isaiah 41:10)

Making the most of Pinterest

Unknown

It wasn’t until recently that I came to realize that I am a bad “pinner.” Pinterest is an amazing site full of ideas that breaks it down in “how to videos” and picture “step-by-step.” It’s incredible. However, if you’re like me, you’ve probably done 10 out of the 4,000 projects you have pinned. Now, its not that we don’t want to do all of these amazing projects, but its easier to pin 100 pins in a night and then say “I will go back and read that later.” Only to find yourself pinning 100 more.. and so on. So I come to the conclusion on how to actually make use of these pins. First off, I find that for myself, baking is the easiest to achieve. I spend 1/2 of my day cooking for my family, so the chance of me using a recipe is very likely. Crafting is next on the list because I would rather attempt to make something than to buy it for full retail price. This doesn’t mean I don’t pin everything that I see in hopes that someday I will be able to try it. Instead, I have separated those “get to laters” from the “I will do this tomorrow.” How? Well, lets start with my boards;

IMG_0009

I have THE most generic boards. Everything is separated by category, and it couldn’t be any more basic.

So, I started to make a new board, a board that had hope.

IMG_0008

This weeks projects! I could go through my current pins and re-pin if I wanted to finally attempt that recipe I found last April. Even better, I could control which projects and recipes I wanted to try without overwhelming myself. You don’t have start with 20 pins, especially considering my goal is weekly. If I wanted more time I could also have made it “monthly goals.” One of the biggest mistakes I find myself making is;

a.) Pinning something that I don’t have the materials to make

b.) Finding a project that I cannot physically achieve, whether it due to lack of supplies or talent.

c.) Getting into a lengthy project that I eventually either run out of time, interest, or put way to much money into. The whole point of the “DIY” is to save money, after all!

So, I started simple.

IMG_0010

I have a small collection of scrap fabric, but I also have bags upon bags of baby clothes that are either stained or ripped. I can’t give them away, so why not repurpose! Im sure I can even find another pin on Pinterest to use the twine. This keeps me from having to postpone my first project, simply because, I have all the materials. Otherwise, I have to put it on hold until I make that trip to the store or receive an online shipment. It’s simple reasons like these that keep you from finishing projects.

Setting a small goal like this keeps your mind focused on one project at a time. I would be comfortable adding a recipe as well. Then, once I get better at multi tasking, build from there.

I think this is a great way to make the most of your Pinterest! Its a shame to go through my boards, only to realize I have some great ideas that got lost in the feed. I’ll let you know how that twine turns out on an upcoming post!

Thanks for reading!

My beautiful daughters, my biggest challenge.

These two. Sure, they look sweet and adorable, and they are, for the most part. Vivian and Scarlett. Two little girls.”Kids will be kids”, they say, but have they ever explained to what degree we’d be dealing with here? I love these two little beings with my whole heart. In fact, I find myself putting most of my everything into them. All the time. I wouldn’t have it any other way. The other half of the time, is for my dear husband. For now, let’s focus on these two. Vivian is 4, while Scarlett is almost 2.

I remember this day, adorable as ever in their matching dresses. Vivian had just turned 3, Scarlett was only a couple months old. I think it was this very moment where they decided to make a pact. Terrorize mom. They say actions speak louder than words, and although I don’t have video footage of these cherished times, I do have pictures. So now, I will let the pictures do the talking.

480119_10201446906077298_832256150_n-2

Now, we will start with Vivian. Vivian was my first child. Coincidentally enough her name actually means lively. Yea, that about sounds right. Don’t get me wrong, she is THE sweetest girl ever. I can’t even begin to tell you how much this little girl has been a blessing. I mean look at that face;

IMG_8148

Adorable.

Now, look at this face…

IMG_5524

Because who doesn’t love that first “I found my mom’s makeup!”

That’s nothing a mother can’t handle..pretty basic.

Well, Vivian decided to go through a “I found my mom’s art supplies!” phase..

IMG_3362IMG_3363

Acrylic paint. On the floor. On her precious items. Chairs, table, walls. You name it. After this was all said and done, punishments were given, I figured it would blow over.

That’s where this comes in..

IMG_3211

Nail polish. Now, I have never turned Vivian down when she has asked for her nails painted, so I was very surprised to see this. The unicorn isn’t the only stuffed animal who suffered this horrible fate. The others? They were given pink eyeballs.

IMG_3905 IMG_4070

My conclusion to the “Vivian story?” She’s 4. She’s a sweet little 4 year old who is living a happy life. I take the bad with the good. Count my blessings…”It could be worse” sort of thing.

IMG_4227

Maybe, I spoke too soon….

Scarlett. Scarlett Isabelle. The Brute. This baby. Well, not a baby anymore. She has kept me on my toes from day 1.

IMG_5267

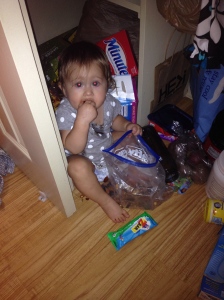
We dealt with the basic baby milestones. “I found the containers!”

IMG_5556

“Drawers are so much fun!”

IMG_5123

.. Access to a whole new world (or just the counters.) Thats when things started to escalate quickly.

IMG_5906

“Need help cleaning out the pantry?”

IMG_6372

“I found the toilet paper!” She even managed to drag it from the bathroom to the kitchen to show me.

IMG_4930IMG_4927

With a little help from a big sister, you can even find this adorable baby hiding under the table, covered in delicious Nutella. I don’t even think she was truly sorry. Especially after that second picture.

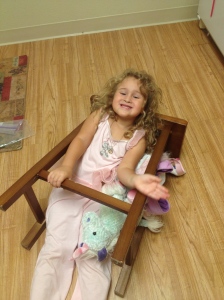
Now, the reason behind all of this is fairly simple. CHAIRS. Children chairs and step stools. I think I have managed to hide all of them behind the baby gate. This is where that all began.

IMG_5514

IMG_9811

Darn chairs.

IMG_8127

This actually happened.

IMG_9893

Who needs paper?

IMG_9948

“Mom’s Valentines day candy? Sure! Why not?”

IMG_8793

IMG_7092

Need I say more?

So for now, I watch these beautiful girls play and wreck havoc. They are the perfect little partners in crime. Scarlett will be two in exactly two weeks, after all. So, bring on the terrible two’s????

-You want to know what’s the funniest thing about all of this? This is me as a child. I try to remember that God never gives you more than you can handle. Besides, my parents did warn me that payback would be coming once I had kids. I have to admit, they were right.

Thanks for reading! (Laughing, I’m sure.)